It's that time again here in the U.S. where we celebrate our independence on July 4th. It's also the time when lots of cities and towns all across America have fireworks shows and if you are a photographer it is a fantastic time to get out and photograph those fireworks shows for some pretty amazing photographs.
Many people try to capture them using point and shoot cameras or hand-holding their camera which will most often result in blurry and out of focus images. With a little planning, timing and throw in luck for some good measure, here are some tips on how to capture the moment with ease:
Secure your camera to your tripod
Use your remote or cable release
Set your camera in manual mode
Set your ISO to 100
Set your exposure to 4 seconds
Set your aperture to f/11
Set your lens to manual and then to infinity focus
So now let's explore these tips a little more in-depth. First, a tripod is a must. With the longer shutter speeds, keeping your camera stable is critical which leads us to also using a remote or cable release. Keeping your hand off the camera is also critical for even the slightest touch can and will render your image blurry or out of focus.
Setting your camera in manual mode allows you to override your cameras metering setting for it will see all that darkness in the sky and try to really lengthen your exposure (maybe 30 seconds) which will then render the fireworks grossly over-exposed and we don't want that so this is why you want to use manual mode.
Keeping your ISO at 100 will give you a much cleaner image with less noise especially since we will have lots of dark or black in our images. Next, setting your exposure to 4 seconds will be just enough time to get the fireworks crisp and bright and depending on the rocket, you may even catch the light trails of it going up.
Next, setting your camera for an aperture of f/11 will allow for very sharp images since you will also need to set your lens into manual mode by first setting the distance to infinity and then switching off auto focus so the lens will not hunt for focus. As far as lens choice you can use telephoto (around 200mm to fill the frame with just the fireworks) or you can go wide (my preference) to capture the experience as well as show perspective.
Lastly, you want to show up a bit early to get a good spot as well as have all your settings locked in (including composition) so once the show begins, you won't be scrambling in the dark and may miss not only getting great shots, but enjoying the show. Remember to also check your results when the show first starts and if the images are too dark, increase your time or reduce your time if they look too over exposed. Alternately, you can also reduce or increase your aperture to get the same effect.
With your skill and a little lady luck, you should come away with some fantastic images and memories of a warm summer night out with friends or family as we celebrate the 4th of July!
----------
BONUS TIP : If your camera has "Bulb" mode (which is when the shutter stays open as long as you hold the shutter release button down) try this technique to get multiple rocket bursts in your image. First, get yourself a fairly large dark pice of paper or cardboard. Next, simply press the shutter release (be sure to hold it down) and expose the scene as you normally would when a rocket is exploding. When the first rocket has exploded, place the paper in front of the lens (be careful not to touch the lens however to avoid shake). When another burst goes up, remove the paper and expose for that explosion. Repeat as often as you like as you effectively "fill" up the sky with the fireworks. I try for only 3-4 explosions per exposure and here luck really comes into play but if you get several that don't explode in the same exact spot the result will be amazing.
To learn more about Robert's photography techniques, check out the following classes at PPSOP.com
Compelling Photographs - "Must Know" Fundamentals of Composition
Wildlife Photography 101
Robert La Follette
PPSOP Instructor
Back Lighting Foods and Liquids
Translucent foods and liquids are ideal candidates for backlighting. You can really show off colors and patterns with your light shining directly through your subject. It is critical that your light source be intense enough and your subject translucent enough to make this work. If you are using fruits and vegetables as a subject, be sure to slice them thin enough to let plenty of light through. If you are shooting liquids, pick something that is fairly light in color. It's much more difficult to get light to penetrate red wine than white wine or dark beers like porter and stout than something like pale ale.The setup is pretty simple and just about any strobe, hot light, speedlite, or even natural light will work. A softbox will make a great light source for backlighting fairly thin foods and light colored liquids as well as providing a nice high key background. A diffusion panel will also work as will a thin piece of white Plexiglas. You can place a very large reflector on your strobe, point it straight up and set a piece of Plexiglas on it to make a "light table". You can get thin sheets of Plexi in different colors to make some interesting backgrounds as well. Another alternative is an actual light table or slide viewing box. Colored gels can be placed on these for different background colors.
Whenever you are shooting towards your light source, you need to watch out for lens flare so a lens hood is definitely required and you can even use your hand or a small flag to block any additional unwanted light from hitting the front lens element. Additionally, masking off your light source so that you are only allowing light through your subject and not around it will also really help avoid flare and increase contrast. Black foam core works great for this. Here are a couple of very easy to set up backlighting sources that will work for many subjects. The first one is a softbox with foam core blocking all but a strip of light and the second is a large window with direct sunlight coming through. Again, foam core is used to block out unwanted light from hitting the front element of the lens.
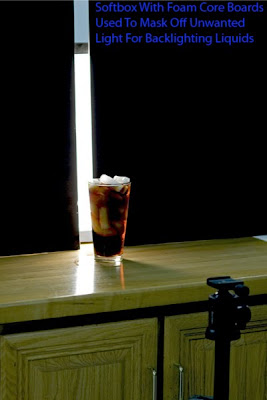
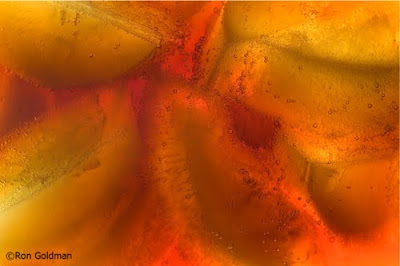
Canon 90mm TS-E w/36mm extension tube
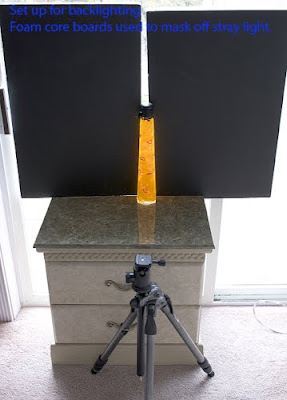
This setup works equally well as long as you have a large enough window with direct sunlight coming through it. Only a thin strip of light is needed to fully illuminate the subject. You really have to be careful when shooting directly into sunlight this bright. Make sure that you don't let any light past the subject or you could hurt your eyes.
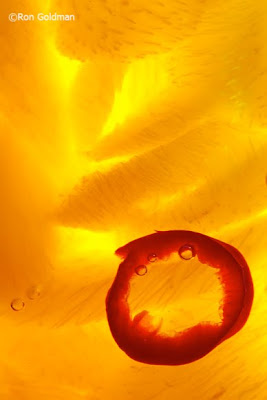
Canon 180mm macro, f/8, 1/40sec
It takes a lot of light to shine through a subject this dense and the direct sunlight works perfectly. Using a macro lens, I was able to completely fill the frame with the subject.
Another method that works great if you have the ability to shoot straight down on your subject is to simply place it directly on a backlit surface. You can make your own light table very easily out of a softbox, strobe w/reflector, or continuous light and piece of Plexiglas if you don't have any other options available. I have used all of the following methods and they all work equally well. You do need to be careful that your working surface is sturdy enough to hold up your subject.
Another method that works great if you have the ability to shoot straight down on your subject is to simply place it directly on a backlit surface. You can make your own light table very easily out of a softbox, strobe w/reflector, or continuous light and piece of Plexiglas if you don't have any other options available. I have used all of the following methods and they all work equally well. You do need to be careful that your working surface is sturdy enough to hold up your subject.
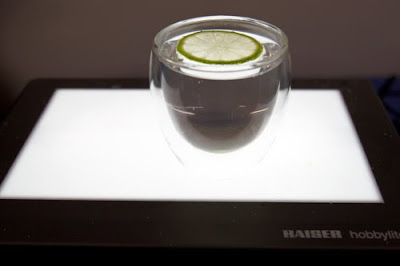
Light box used for backlighting.
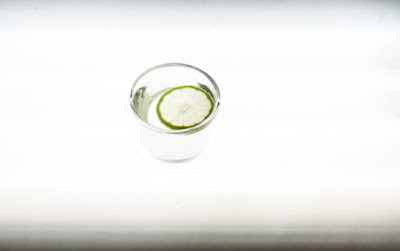
Fluorescent studio light with white plexi used for backlighting.
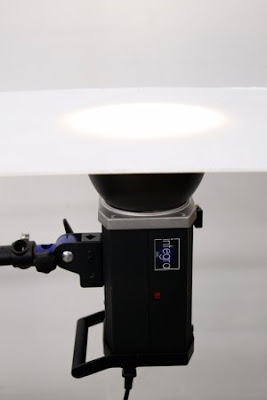
Strobe w/7" reflector and white plexi for backlighting.
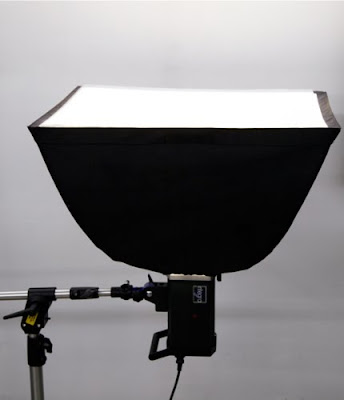
Strobe with softbox and white plexi used for backlighting.
All of these lights/setups are suitable for creating beautiful backlit images. The following are some examples of what can be done. There are hundreds of other subjects that will work equally as well.
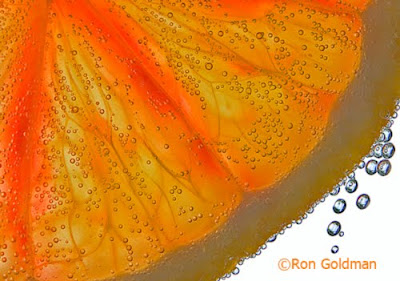
Canon 28-70mm w/20mm extension tube, f/11, 1/2sec
Orange slice in sparkling water, sitting on a light box. The light coming past the orange makes a nice high key background.
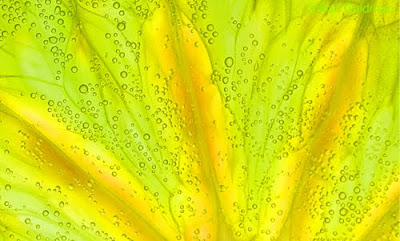
Canon 28-70mm w/20mm extension tube, f/11, 1/3sec
Switched out the orange slice for a lime and placed a green gel under the glass for color.
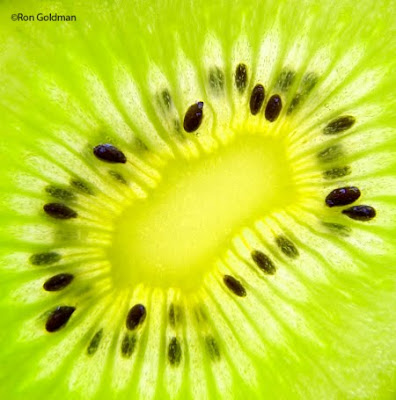
Canon 28-70mm w/36mm extension tube, f/5.6, 1/30sec
Thin slice of Kiwi placed directly on light box. The extension tube allowed me to move in close enough to fill the frame.
To learn more about this and other food photography techniques, check out the following classes at PPSOP.com
Introduction to Food Photography Food Photography 201 - Recipes for Success
Ron Goldman
PPSOP Instructor


